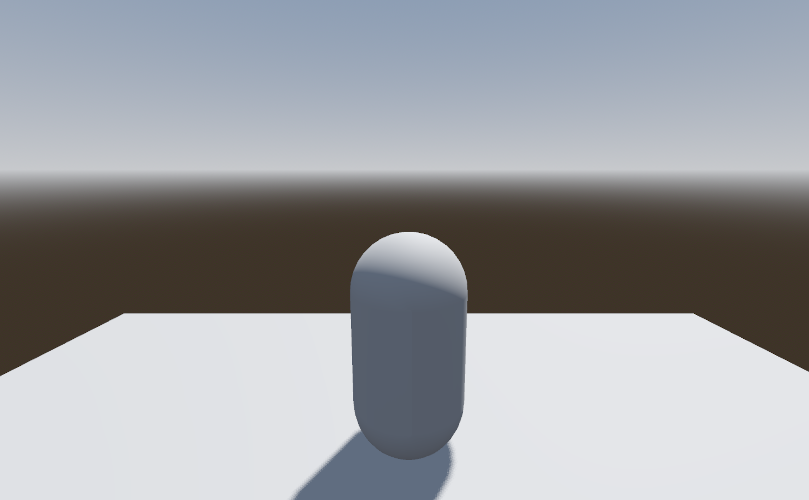
In this lab, we will build a small platformer game with a capsule for the player, and we'll see how we can have the camera follow the player.
Ex. 1. In this lab we'll create a simple 3D platformer game. Demo Part 1 ; Demo Part 2.
Environment
Open Unity Hub and and create a new project called 3DPlatformer, of type Universal 3D.
Rename the scene as Level.
Ground
Add an object of type Plane and call it Ground. The default size of such a plane is 10 x 10, so leave it like that for now.
Camera Setup
Select the Main Camera object in the hierarchy. Set the Y coordinate to 2 and the Z coordinate to -5.
Project Settings
In the top menu, click on the File menu and then on Build Profiles and add the open scene to the build. Then in the top right corner, click on Player Settings. This adds another dialog with a bunch of things we can configure.
With the Player selected on the left, expand Resolution and Presentation. Under that, switch the Resolution from Fullscreen Window to Maximized Window. Further down, under Lightmap Encoding and HDR Cubemap Encoding, switch to Normal Quality. You can switch these back to higher values if the game doesn't look right to you. You can close the two settings panels.
Player and Scene
We will now create an object for the player.
Using the + button in the Hierarchy, add a new object to the scene of type Capsule and rename it Player.
This object comes with a pre-made collider, but since it's going to be moving, let's add a Rigidbody component to it from the Physics category. Change the collision detection in this component from Discrete to Continuous. Below that, expand the Constraints and check the boxes to freeze the rotation on all 3 coordinates.
Set the position of this object in the inspector at the top as 0 x 2 x -2. Run the program to see what happens. The capsule should simply fall to the ground and rest there. This is the right behavior so far. To be able to control its movement, we need to add a script to it.
Input Configuration
Let's configure what keys to use in the project to move the player. In the Project area (bottom left), directly in Assets, you'll see an object called InputSystem_Actions.inputations. These are input actions applied to the whole system. We want to create one just for the player.
Still in the Project area, click the + button and select Input Actions. Rename the object created as PlayerActions.inputations. Click on this object, then in the Inspector, click on Edit Asset.
First, let's add a control scheme. Click on No Control Schemes and then on Add Control Scheme. Call it Player Control Scheme. It currently shows an empty list. Click on the + to add a Device Type, and then select Keyboard. Follow the Usages and select Primary2DMotion. Then repeat the operation to add PrimaryAction. Then add from the Mouse options, Point. Click the button below it to save it.
Now, let's add some actions and bind them to inputs. Under Action Maps, click the + button to create a new action map, and call it Player. Then under Actions, click the + to add an action, and call it move. On the right, under Action Type select Value and under Control Type select Vector 2.
Click on the + next to the move and choose Add Up/Down/Left/Right Composite. 4 components should appear (you may have to expand the move). Click on the Up line and then on the right under Binding, click on Path, then Keyboard, then By Character Mapped to Key, then select the W key. Check the option to use it with the Player Control Scheme. Repeat the last step to bind Down to S, Left to A, and Right to D.
Add another option for the move action in the same map called Arrows. Repeat the procedure to bind the 4 movements to the arrow keys. You'll need to use By Location of Key to be able to select the arrow keys.
With the + next to Actions, add another action called jump. Leave its Action Type as Button. Expand this action and click on the binding that appeared. Connect it on the right to the Space bar using By Location of Key. Also check the box to use it in the Player Control Scheme.
Click Save Asset on the top right, then close this dialog.
Then with the PlayerActions still selected, in the inspector, check the button to Generate C# Class. Give it a file name PlayerControlCore.cs and a class name PlayerControlCore. Then click Apply. It will create a script directly under Assets. Create a folder called Scripts and move it inside of it. Open this file in the editor. This has defined a partial class called PlayerControlCore that defines the input maps the way we've set them up and the callback functions needed to move. It's a partial class to allow the programmer to put their own code in a separate file.
Let's attach the input system to the player object first. Click on this object and add a component of type Input ->Player Input. Drag the file PlayerInputs over the Actions part of this component, and select the Player Control Scheme for the Default Control.
Script. With the Player still selected, click on Add Component in the inspector and select a New Script at the bottom of the menu. Name this script PlayerControl and save it in the Scripts folder. Now double-click on it to open it for editing.
Add the following namespace directive at the top of the script, before the class definition:
using UnityEngine.InputSystem;
At the top, declare a class variable to hold a reference to the rigid body component:
Rigidbody rbody;
private PlayerControlCore inputActions;
Then add the following function:
void Awake()
{
    rbody = GetComponent<Rigidbody>();
    inputActions = new PlayerControlCore();
}
This function is executed before the function Start. Next, we need to enable/disable the actions. Add the following two functions:
void OnEnable()
{
    inputActions.Player.Enable();

    // Subscribe to the Jump and Move action performance
    inputActions.Player.jump.performed += OnJump;
    inputActions.Player.move.performed += OnMove;
}
void OnDisable()
{
    inputActions.Player.move.performed -= OnMove;
    inputActions.Player.jump.performed -= OnJump;
    inputActions.Player.Disable();
}
To make referencing the velocity components easier, add the following function to the class:
float vx()
{
    return rbody.linearVelocity.x;
}
and similar functions for Y and Z.
Player Movement
At the top of the class, declare the following variables:
public float speed = 6f;
public float jumpForce = 5f;
private Vector2 moveInput;
Then go back to Unity. These variables should have been added as attributes in the script component of the Player. You can leave the speed and the jump force as they are for now, but this lets us calibrate these values more easily later.
Then add the following two functions that will respond to move and jump actions:
void OnMove(InputAction.CallbackContext context)
{
    moveInput = context.ReadValue<Vector2>();
    // Apply horizontal movement physics
    Vector3 movement = new Vector3(moveInput.x, 0f, moveInput.y) * speed;
    rbody.linearVelocity = new Vector3(movement.x, vy(), movement.z);
}

void OnJump(InputAction.CallbackContext context)
{
    // Simple ground check approximation (modify based on your ground detection logic)
    if (Physics.Raycast(transform.position, Vector3.down, 1.1f))
    {
        rbody.AddForce(Vector3.up * jumpForce, ForceMode.Impulse);
    }
}
Note that in Unity, we cannot modify individual components of the linear velocity, we can only assign a full vector to it.
For the OnJump function above, the function Raycast returns true if there is any intersection of a vector going from the player's position down on a distance of 1.1f with some other object, presumably the Ground. Given that the distance from the center of the capsule (its position anchor) and its bottom is 1, this checks just a short distance below the object. If there is an intersection, it applies a force to it in the Up direction to send it up. If you've set the attributes properly in Unity, the jump should also be working.
Camera Tracking Player
Let's have the camera track the player and rotate with as as the player is moving around.
Click on the Player object to select it. Click on the + and add a new node of type Create Empty Child. Rename this node TwistPivot. Set its position as 0 x 1 x 0. Add a child of this node and call it PitchPivot. Set its position at 0 and the rotation over X as 10 (degrees).
With this, in the hierarchy, move the Main Camera object and make it a child of the PitchPivot node by dragging it and dropping it over this object. Now the camera will move with the player subtree and be affected by transformations applied to the two pivots. Set the camera position to 0 x 0 x -3 and its rotation in all directions to 0.
Save the scene and test the program. Now the camera should be moving with the player.
Mouse Control
We would like to make the mouse invisible on screen and confined to the application window while playing. However, when the player hits the ESC key, the mouse should become visible again and unconfined.
First, we need to modify the player inputs to add a couple of controls: of the mouse movement and of the escape key that makes the mouse visible again. Click on the asset PlayerInputs.inputations and then in the inspector, click Edit Asset. Under the Player Action Map, add a new action called cancel. In the action properties, leave it as Button. Expand it and click on the binding below it, and select the path Keyboard - By Location of Key - Escape. Check the Player Control Scheme for it.
Then add another action called track. In the Action Properties, change the Action Type to value and the Control Type to Vector 2. Then click on the binding below it and choose the path Mouse - Delta. This will give us a 2D value with the amount of movement of the mouse on the screen. You can add a separate one called zoom of type value/Axis. Then add a binding to it of type Positive/Negative Binding. Connect the negative to path Mouse - Scroll - Down and the positive to Mouse - Scroll - Up.
Close the dialog, then with the PlayerInputs asset still selected, change the file name to Assets/Scripts/PlayerControlCore.cs. The script will automatically be updated with the changes you made to the asset.
Going to the PlayerControl script, add 3 functions OnCancel, OnTrack, and OnZoom, with the same parameter as for OnMove and an empty body, like
void OnCancel(InputAction.CallbackContext context)
{
}
Then add 3 lines in each of the functions OnEnable and OnDisable for the new controls cancel, track, and zoom.
To be able to show and hide the mouse in the game, add a bool variable to the class mouseHidden initialized as false. add the following two functions in the script:
void HideMouse()
{
    Cursor.visible = false;
    Cursor.lockState = CursorLockMode.Confined;
    mouseHidden = true;
}
void ShowMouse()
{
    Cursor.visible = true;
    Cursor.lockState = CursorLockMode.None;
    mouseHidden = false;
}
Now call HideMouse in the function Start and the function ShowMouse in the function OnCancel.
To test this, when playing the game you need to click on the game play window first to see the mouse disappear. When you hit the Escape key, it should appear again.
Then, we want to capture mouse movement in our scene. First, at the top of the class, add the following variables:
public float mouseSensitivity = 1f;
public GameObject twistRef;
public GameObject pitchRef;
The latter will hold references to the two pivot objects. Going back to Unity, check that these were added as attributes to the Player in the script component in the inspector. Then click on the circle next to None for each of them and select the corresponding objects from the list. Now the script has access to these objects. Add the following code to the function OnTrack:
if (mouseHidden)
{
    Vector2 mouseMove = context.ReadValue<Vector2>();
    float mouseX = mouseMove.x;
    float mouseY = mouseMove.y;
    if (mouseX != 0 || mouseY != 0)
    {
        float twistInput = -mouseX * mouseSensitivity;
        float pitchInput = -mouseY * mouseSensitivity;
        twistRef.transform.Rotate(0, twistInput, 0);
        pitchRef.transform.Rotate(pitchInput, 0, 0);
    }
}
Now when you play the game and click in the Game window, moving the
mouse should rotate the camera proportionally. If we don't want the
camera to rotate too much when we move the mouse, let's force the
rotations to [-60o, 60o]. Add the following code
inside the inner conditional above:
float twistY = twistRef.transform.eulerAngles.y;
if (twistY < -60)
    twistRef.transform.Rotate(0, -60 -twistY, 0);
else if (twistY > 180 && twistY < 300)
    twistRef.transform.Rotate(0, 300-twistY, 0);
else if (twistY > 60 && twistY <= 180)
    twistRef.transform.Rotate(0, 60-twistY, 0);
Perform a similar changes to pivotRef applying it to the X rotation. Then turn the entire code dealing with the mouse into a function called MouseMove and make a call to this function in OnTrack.
Forward direction
Now, we'd like the player to move forward in the direction of the camera, and not in the global direction. To do this, replace the lines defining the velocity of the rbody in the function OnMove with the following (but keep the previous code):
Matrix4x4 direction = twistRef.transform.localToWorldMatrix;
Vector3 motion = new Vector3(horizontalInput * speed, vy(), verticalInput * speed);
rbody.linearVelocity = direction.MultiplyVector(motion);
This gets the transformation matrix of the twist pivot and applies it to the motion direction vector. Test the program to see how well it works. This is the end of the lab.
Create a few other plane or box objects places around the ground one, accessible to the player by jumping, to create a more complex level. Apply some materials to the objects to make the game look better.
Collectibles. Add a few collectible objects that the player can look for. You can make them yellow cylinders with a small height, and lay them on the side to look like coins. Add a counter to them and increment it every time there is a collision. Set them with a tag such as "coin" that you can check from the code.
You will need to add a function OnCollisionEnter(Collision colInfo) to the player control script to handle the collision. In this function, when the tag of the object colInfo.collider is equal to the tag you added to them, delete the object by doing
colInfo.collider.gameObject.SetActive(false);
Reset. In the function Update, add a check for the y coordinate of transform.position being less than -5, or a few units lower than the lowest platform you created. If true, reset the player to the original position, (0, 2, -2). This will place the player back to the original position when it falls off a platform so that the game doesn't need to be restarted.
Optional: figure out something to do with the zoom (mouse scroll) button.
That's it for the homework. Create a build for Windows in its own folder, and zip the entire build folder to submit here. Take a screenshot of the running program for the submission as well. You will also need the files Level.unity and PlayerControl.cs. You can add all of these files to the zip file you created from the build folder.
Submit the zip file containing the Windows executable, level and script files, and the screenshot of the game to Canvas, Assignments - Homework 2.