Ex. 1. In this lab we will work on a 3D object in Blender representing a bee. First, we will create a texture for this object, or a "skin", and second, we will animate the wings.
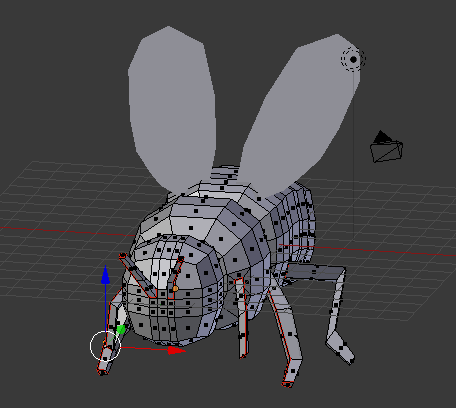
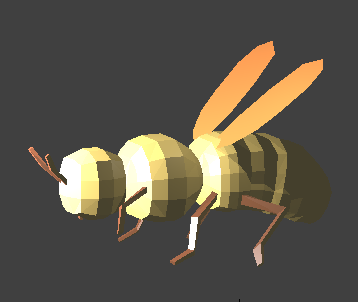
Boot your computer on MacOS. Download the file bee.blend or download it from Canvas. Open it in Blender. Here is what the object should look like:
Remember to use the scroll button to zoom in and out. Use the scroll with shift and then with ctrl to move the scene up-down and left-right. Use the NumPad keys 4, 6, 8, 2 to rotate the view. You can also use the scroll button with Ctrl+Alt for rotating the view around the vertical, and with Ctrl+Shift and Alt-Shift for the two other rotations.
Use the NumPad keys 7, 9, 1, and 3 to switch to the standard views. Use NumPad 5 in either view to switch from Perspective projection to Ortho and back. Note the 3 axes in colors red, green, and blue, and how they are each aligned in the different views.
Finally, use NumPad 0 to go back to the initial camera view and NumPad 5 to switch to Perspective view.
These views can also be accessed from the View menu (bottom left of the screen).
The object is in Edit Mode. If you examine it, you will see some red lines. These are "seams". To create a personalized texture for this object to be drawn as a separate file, the object is first cut along these seams and projected onto a flat surface. The seams mark the places where the object is cut, to make it easier to project it.
I have added most of the seams we need, but I left a few for you to add. If you examine the legs, the front and middle pairs are already marked, while the back legs are not. Switch to Edge Select mode (bottom toolbar, right of Global). Arrange the view so that one of the hind legs is facing towards the front and zoom in on it as needed. Right-click on one of the top edges, then shift-right-click on the one following it along the leg, and again on the next one. 3 of them should be selected now. Hit Ctrl-E, which should bring up a menu. From there, choose Mark Seam. Hit A to unselect the edges. Rotate the view a little so that you can see the rectangle closing the leg well. Select the same way 3 of its edges (not all 4) and mark them as seams. Repeat the procedure for the other leg.
Rotate the view to bring the head of the bee facing you. We would like to cut the body of the bee in half, but there is no edge line in the middle. Let's add one. In the Tools menu on the right, click on Loop Cut and Slide, and position the loop to be create along the center of the bee, going form the head towards the wings. Click one, and then again to set it in place. Without deselecting it, mark it as a seam.
Let's add an axle between the two wheels. Click on a point in between the wheels for the anchor point, then click on Cylinder in the Create toolbar. Look at the bottom left side of the window where we have some parameters for the new object. Set the radius to 0.1. The others can be left as the default. Then rotate the cylinder to be aligned horizontally and move it to connect the wheels. Set a light gray color for this object. Hit a to deselect the object.
Notice the top right corner of the view window marked with a few thin lines. grab that corner and pull to the left until you have created two views of about the same size. At the bottom left of the right-hand side half, to the right of the View menu item, there is a small cube. Click on it and select UV/Image Editor. You can zoom in so that the square fit the screen.
Going back to the left side (the 3D object). Still in Edit mode, select the entire mesh by hitting A.Then from the Mesh menu at the bottom, select UV Unwrap, then Unwrap. You should see something like this on the right side of the window:
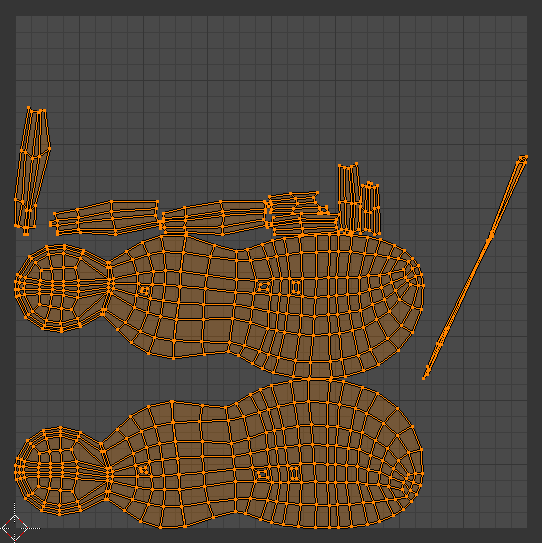
This is the object projected on a 2D surface, let's call it the UV map. We can use this to color the bee. However, we can also rearrange the objects to see them better.
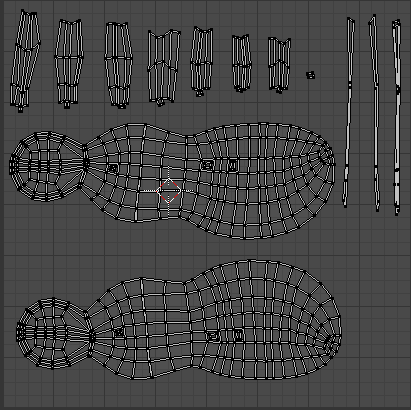
In the toolbar below the UV map, you will see a few selection modes (towards the right). Click on the UV Selection and Display Mode: Island. This allows us to select whole regions at a time. Hit A to unselect everything (on the right side). Use right-click to select an island, right-click-drag to move it around, R to rotate it, and S to scale it. Arrange the islands so that each of them is visible and well separated from the others, like in this example below:
If you want to see which pieces correspond to what, deselect everything, then click (right side) on the cube to the left of the selections to sync the two sides of the window. Then you can use B to sect an area on the right and look at the 3D object on the left to see where the area is placed on the object.
First, we need to save this map as an image file. Hit A to select everything in the map. From the UVs menu (right side) choose Export UV Layout. Give it a name such as beeLayout.png.
Open the folder containing the image in explorer (Finder on MacOS). Open it for editing with the Gimp or with Photoshop - whichever you're more familiar with. Add a new transparent layer that you will be coloring in.
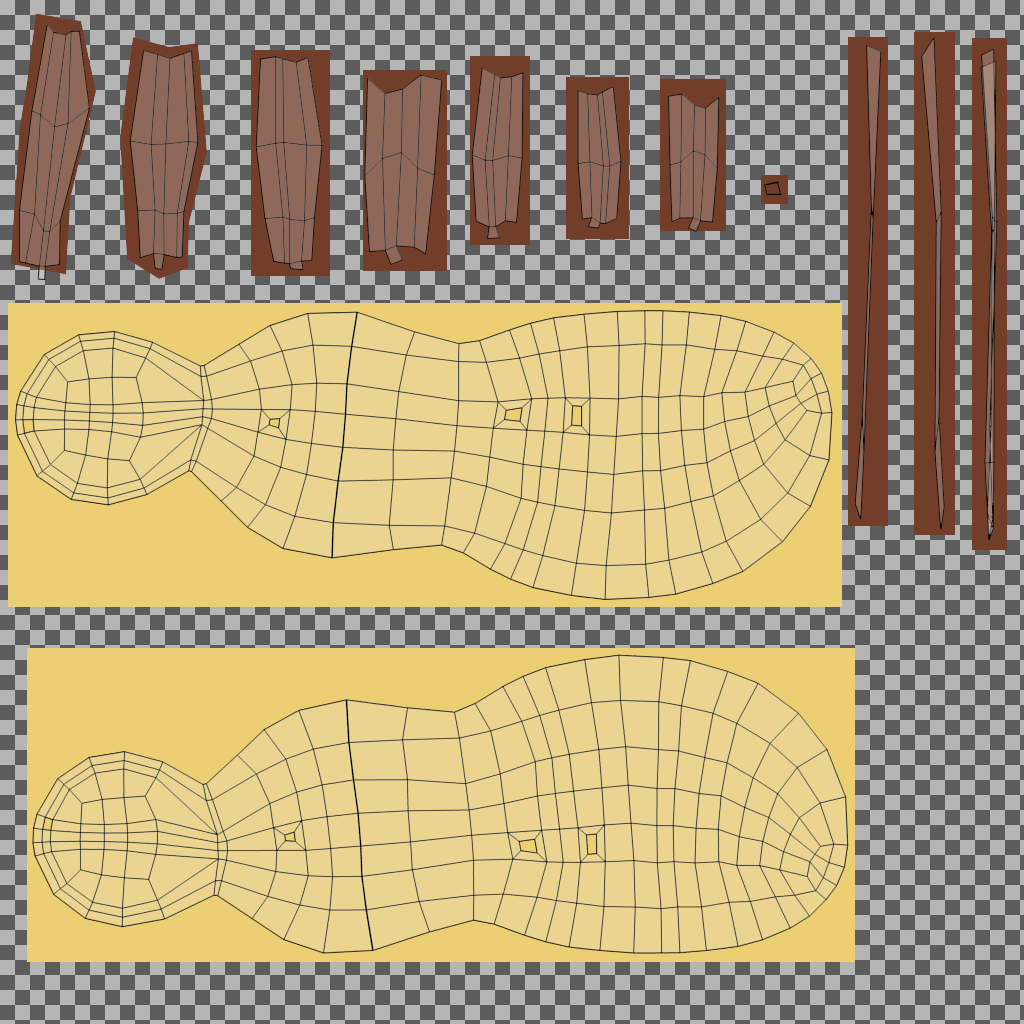
Basically, you need to cover each region marked in the image file in some color that will then be applied to the object. It doesn't matter if the color bleeds outside of the region as long as it covers all the needed surfaces. The easiest way is to select rectangular regions around each island and use the bucket tool to fill them with a color. Here below you can see the working version of one where all the legs are brown and the body is yellow. I moved the original layout on top of the coloring one.
Save the file in a native format so that you can edit it later if you want (for example, to add stripes to the body of the bee).Then hide the layout containing the original layout and export it as a png file, for example, under the name beeColor.png.
Coming back to Blender, make sure that the entire bee object is still selected in Edit Mode. On the right hand side, click on a button that say Open (next to New). Choose the beeColor.png image you saved. Once open, the image should be superimposed on the UV map.
The texture is already applied to the object. To see it, on the left side of the window (3D), switch from Edit Mode to Object Mode. Then in the square next to it, switch from Solid to Texture. You may have to add a light source or increase the ambient light in the world to see it better. However, if you render it, it doesn't appear yet.
With the bee object selected, in the toolbar on the far right hand side, find a button that says "Material". We've used it before to color objects. Scroll down to Options and check Face Textures. This will cause the texture image to replace the color of the object.
Use the material to set a flat color to the wings, the way we did for the truck. Here is an example of the result, with an additional light source and with the objects shown in Rendered mode:
You can remove the right side of the window after this by dragging the top right corner of the left side.
We would like to animate the bee's wings so that it looks like it's flying.
In the scene viewer in the top right corner of the window, rename your wings as LWing and RWing. The grab one of them (left click) and drag it under the other in the hierarchy to make it its child. This way if we rotate the parent wing, the child wing will also rotate.
Select the parent wing. Go to Edit Mode, point selection mode, and select one point at the bottom of the wing. We would like to make this the center point of the wing so that it rotates around it. Hit Shift-S and choose Cursor to Selected. You should see the target set on this point.
Switch to Object Mode. Without clicking anywhere, hit Ctrl-Alt-Shift-C and select Origin to 3D Cursor from the menu. Try rotating the wing now to see if it works.
In the timeline below the 3D object, make sure that the green marker is at position 0. Then click on the Animation tab on the left side of the window and under Keyframes click Insert - Rotation.
Move the cursor in the timeline to position 10. Switch the view to Left. Rotate the wings up, then move them so that the bottom tip aligns with the previous position. Then click on Insert - Rotation again.
Move the cursor back to 0. Click on Play to see what the animation looks like. You can repeat the process to create a flying motion for the wings.
Adjust the camera's position and orientation so that you can clearly see the entire bee in the static rendered image. You may have to add several light sources to see it well.
In the tool selection bar on the right-hand size of the window below the scene hierarchy, click on the first button for Render. Under Dimensions, move the End Frame down from 250 to 80 or to 10 frames after the last one you created. Then scroll down to the Output section. Here click on the folder currently saying /tmp/ and select your currently working folder. Then click on the button showing PNG for the output type and select AVI JPEG form the Movie column.
Then from the Render menu on the left, click on Render Animation. Give it some time to complete the rendering. You will find the file in the working folder. Rename it as something friendlier.
Add some stripes to the body of the bee. You will have to reload the image file in Blender after you edit it outside. To make the animation easier, you can add a bone to the wings. This would allow you to create and store different poses for the wings, and be able to simply select a new pose in the keyframe.
Take a screenshot of your bee in rendered mode to upload to Canvas or just recover a rendered image if you adjusted the camera well.
Upload to Canvas: the Blender file, the PNG color file for the texture, and the screenshot or rendered file.