This homework focuses on vector images created with Adobe Illustrator which is part of the Creative Suite 6. Both the homework and lab are individual. They can also be completed with Inkscape (https://inkscape.org/en/) if you don't have Illustrator.
Ex. 1. Complete Lab 3 and make sure that you have three files resulting from it: in ai, svg, and png formats.
Ex. 2. Vector-style art
Open Adobe Illustrator and create a new landscape document and make
sure you are in a Painting workspace. Save it as hw3.ai.
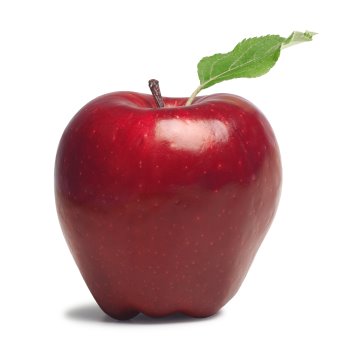
We will try to reproduce the following image:
From the browser save this image in your working directory. Go back to your Illustrator window and from the File menu, open this file. You should be able to see both tabs at the top. Using the Selection tool, click on the apple image (the rectangle should be selected) and copy it. Go back to the hw3 file and paste it. It should now appear as a bitmap in your window. You can zoom on it a little, but make sure you still see the whole apple.
Next, we'll create a curve outlining the apple. In the left side toolbar, choose the Pen Tool (just under the Lasso). Click somewhere at the top or the apple on the border to add one point. Then click on a second point nearby to add a second point connected by a line segment. Continue this way in reasonably small increments until you come around on the other side. For the last point you should click again on the starting point to close the curve.
Make sure that the entire path is selected, then click on the Direct Selection tool. You should see all the anchor points selected. Holding the shift, click on one of them to deselect it. Now all the others should be selected. The top toolbar should now display Anchor Point. Click on the second button next to Convert to turn all these anchor points into smooth points. Then click on the one that has been deselected before (only this one should be selected now) and make it smooth too. If not, you click on individual anchor points and make them smooth one by one, or click on each of them holding the shift, and make them smooth in one action. If you find a faster way, let me know. The goal is to have all the points in your curve smooth. You can more around individual points to adjust them better to the shape of the apple.
Switch to the selection pointer again and make sure your closed curve object is selected. In the vertical toolbar next to Color, use the Appearance button and the Gradient button to make the stroke transparent. In the Fill tab choose a linear gradient (like the black and white), the Gradient tool. Give the gradient an angle of -90 degrees and then double-click on the two color tabs to change the colors. Choose the color at the bottom to be a very dark red, similar to the darkest part of the apple, then switch the second one (that goes on top) to a lighter red. Make sure both colors are completely opaque.
From the Object menu, choose Arrange - Send to Back. This should bring the apple bitmap back to the top (but don't worry, your object is not lost).
Create a new object similar to the first one but for the brighter red close to the top of the apple and smooth the outline like before. Open the Fill and Stroke dialog for this new object and make the stroke paint transparent. Fill the object with a solid color in a bright red similar to the apple behind it. When done, move the object backward just one level (Object - Lower).
Create a new object over the almost white spot at the top center of the apple. Apply the same procedure as before, transparent stroke, a solid white-pink color or with a radial gradient that is close to white in the center, and this time make the fill about 70% opaque a third transparent. Then blur it again a little bit more than the other one (because it's smaller). Lower this object too.
To see the result so far, select the bitmap object, then send it to the back (completely). Then bring it back to the top to continue working.
Add at least 3 more objects for the highlight region around the twig and leaf, for the twig, and for the leaf. You can use more than 3 objects if you want. Once you have all the details the way you want, delete the original bitmap object. Now the apple should appear entirely in vector art style.
On your own: add any other decorations you want to this
drawing. Add a plain rectangular object for the background and lower
it to the bottom of the drawing. Save your work in ai, svg, png
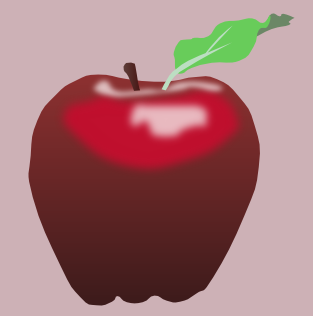
formats. Here is an example of resulting image (using radial gradients
with a transparent outer color):
Upload in: The 6 resulting files from exercise 1 (the lab) and exercise 2, in ai, svg, and png formats. You can create a zip archive of these files to upload them more easily.