Install Unity Hub to your computer, then add Unity 2020.3.6f1 or the latest version. Make sure to check WebGL in the list of supported platforms, the system you are working on (Mac or Windows), both Windows platforms, and whatever else you want. Then register for the free version.
Ex. 1. In this lab we'll get used to the Unity environment and write a small application implementing the game of Hangman. This lab assumes a Windows installation, free version 2020.3.6f1. In another version, things might work a bit differently.
Open Unity Hub. Create a new project from the Projects tab, the Core section, 2D Core, and call it Hangman.
Assets. In the Project area in the bottom left quadrant, note a folder called Assets. Here you will store all the resources needed by the project. If you don't already have one, create a folder called Scenes inside it using the Create button under Project. In this folder there should be a scene already, that is currently opened. Rename the scene as game. If you don't have a scene there, from the File menu choose Save As. Choose the folder Scenes inside the project folder and give the scene the name game. Remember to save the scene from time to time. You will be asked to reopen the scene because you renamed it. Just click yes. Note that if you reopen the project later, you will also have to reopen the scene to start working on it again.
Art. In the Assets folder, create another folder called
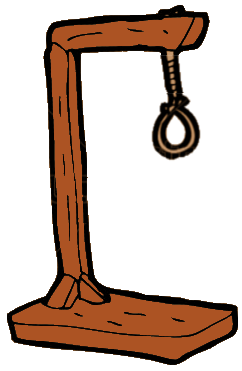
Art. Download the following images in a local folder:
gibbet.png
head.png
body.png
leftHand.png
rightHand.png
leftLeg.png
rightLeg.png
Drag all the image files into the folder Art in Unity from the
Windows Explorer or the File Explorer. If you click on any of them,
you should see them imported as Sprite (2D and UI). If they
are not, you can change each of them to that in the Inspector (right
side of the screen) at the top in Texture Type. If you get a
message saying "Unapplied import settings for ...", click Apply.
a. Camera and Layout Setup. In the Scene area, make sure that the 2D option is checked. Also in the Scene area, in the center of your window you can see a little camera icon. This identifies the camera object in your game. Click on it to select the object. Note that you can also select it by clicking on its name (Main Camera) under Hierarchy. The white rectangle around the camera defines the area of the scene that will be visible to the player when the game runs. If you don't see it, you can zoom out using the scroll button on your mouse. The box around the camera icon lets you move this object around and scale it, though there is no reason to do that for now.
Inspector. On the right-hand side of the screen you see an area called Inspector. This shows all the attributes of the object that can be edited. First, under the Camera, switch the first option from Skybox to Solid Color. Then with the camera object still selected, you can click on the blue box next to Background to change the color of the game background. make sure that the Projection is Othographic.
One thing you can do with the camera is to change the color of the background. You can do that by clicking on the blue box bext to the label Background in the Inspector. Choose whatever color you like, but keep in mind that the sprites you imported must be visible on it.
Gibbet. Drag the gibbet sprite to the scene. Position it to the left side of the scene. If you see a blue box and arrows on it, then drag the box to move the object. If not, check the small buttons on the left side of the screen, above the Hierarchy label. The second one lets you move the object. Click on it and move the gibbet to the left side of the camera area. Then click on the 4th button to scale the gibbet so that its height is almost as large as the scene height. Or you can use the 5th button both to scale and move the object. Note that is you hold the Shift while dragging a corner, the object will be scaled while keeping the ratio.
Stick Figure. Repeat the operation with the rest of the sprites to assemble a stick figure and place it on the gibbet. Note that you can use the scross button to zoom in so that you can see what you're doing better.
Script. Let's see a simple example of manipulating game object attributes through a script. Click on the body object and un-check the box next to its name in the Inspector. The object should disappear from the scene, but the name should still be listed in the hierarchy. Its status is now "deactivated". We will activate it in the code when the user performs a left mouse click. We will attach the functionality to the head object, although the mouse click is not restricted to it.
Create a new folder in the Assets called Scripts. Click on the head object. From the Inspector, click on Add Component, then New Script. In the dialog that opens, call this script ActivateBody. After you create it, move it into the Scripts folder, then double-click on it. This should open the file in Visual Studio.
You should see two functions in this script, Start and Update. Inside the class ActivateBody, before the function Start, add a line with the code
public GameObject bodyRef;
GameObject is a class in Unity that all the objects in a game are derived from. This will hold a reference to the object body so that we can activate it. Then inside the function Update, we'll add a test to see if the user has done a left mouse click. Add the following code in this function:
if (Input.GetMouseButtonDown (0))  // left mouse click
    bodyRef.SetActive (true);      // activate the body object
Before this can work, we need to connect the body object in Unity with the bodyRef variable in the script. But first, compile the script to make sure there are no errors - from the Build menu, choose Build Solution (or Ctrl-Shift-B). If there is no Build menu, just go back to Unity and a dialog should show that the script is being compiled.
Then go back to Unity and make sure the head object is selected. In the Inspector, the variable bodyRef should show up as an attribute with the name Body Ref and the value None (GameObject) (equivalent to a null pointer). Drag the body object from the hierarchy and drop it in the value box of this attribute.
Execute. Select the head object and make sure it is activated (click the box next to its name in the Inspector, making it visible). The application should be ready to run now. Click on the play button above the scene. Make sure beforehand that the camera box covers the entire gibbet and stick figure. When you fire up the game, the body should be missing, and click anywhere in the game window should make it appear. Click the play button again to stop the execution. Then in the Inspector, click on the small wheel to the far right of the script name, and choose RemoveComponent. The script should still be in the Scripts folder, but not active on the object anymore.
When the game starts, no part of the stick figure should be visible. Go ahead and deactivate all of them.
Interface Objects. We still need a few interface objects before we can add the game functionality.
First, we'll need a text box where the word to be guessed will be displayed. Click on + (Create) under Hierarchy (top left corner) and add a new empty object to the scene. Rename this object guessTxt. Then add a component to it from the Inspector and select Mesh - Text Mesh. Set the displayed text for now as "_ _ _ _". Set the font as Arial by clicking on the small circle next to the label None. Set the font size as 36, then adjust the Character Size to set an appropriate size to the object. Larger font sizes generally look better. Change the font color to something that contrasts well with the background color you chose for the camera. Place this object somewhere in the scene where it can later display longer content (the Move tool works better for this object).
Repeat the procedure to create another text are somewhere in the top-right area that will display the letters that the user has already entered. An easy way to do this is to duplicate the existing object (right-click on it in the hierarchy) and edit the attributes of the copied object. Let's call this text object historyTxt. Then create another text box in the right-center area and write "Your guess:" in it. Give it any name you want.
The last piece that we need is a way to receive keyboard input from the user. The expression Input.anyKeyDown will return true when the user clicks a mouse button or presses a key. Then the expression Input.inputString should contain the keys having been pressed so far. However, it doesn't always work. We are going to use instead the class Event that works well when combined with the overloaded callback function OnGUI().
Select the text object guessTxt. Add a C# script component to it and call it RunGame. This is where the functionality of the game will be. Move it from Assets into the Scripts folder, then double-click on it to open it for editing.
OnGUI function. Comment out the function Update for now. Add the following function:
// Callback function for keyboard and mouse actions through events
void OnGUI() {
    Event e = Event.current; // get the current event
    if (e.isKey)             // check if it's a keyboard event
        Debug.Log("Detected character: " + e.character); // console output
}
Save and compile the file, then go back to Unity to test it. At the bottom of the screen, next to the Project tab, you'll see a tab called Console. Click on it. Now when you run the app, every time you hit a key, a message should appear on the console informing you of the key that you pressed.
Code. Now that we have prepared everything we need, it's
time to start writing the game code. We will need access to the
historyTxt object. In the class RunGame, declare the
attribute:
public GameObject historyRef;
before the function Start.
The function GetComponent <component name>() allows
us to access an attribute or component of the game object that the
script is a component of. In the function Start, we want to
clear out any text that is in this text box, so add the line:
historyRef.GetComponent <TextMesh>().text = "";
Going back to Unity, click on the guessTxt object, and in the area of the script component you should now see an attribute called History Ref. Drag the historyTxt object from the hierarchy and drop it over this box to make the connection. Test the app to see if it works.
We can now add some code to start with a list of words from which we'll choose one at random, and then set up the guessedTxt object with the appropriate content. Let's declare this attribute containing an array of strings before the function Start:
private string[] words = new string[] {"", ""};
Fill the quotes inside braces with some words of your choosing and complete the declaration with 10 words total, each enclosed in double quotes and separated by commas. Then declare three private attributes of type string called word, guess, and history and initialize all of them with an empty string. Now let's write a function that chooses a random word out of the 10, stores it in the variable word, and then initializes the variable guess with a string containing "_ " (underscore and one space) for each letter in the word. First, add the following function in the class before the function Start:
// Choose a random guess word and set up the guessRef object based on it
void ChooseWord()
{
    int i = Random.Range (0, words.Length);
    word = words[i];
    guess = "";
    for (i = 0; i < word.Length; i++){
         guess += "_ ";
    }
    GetComponent<TextMesh> ().text = guess;
}
Note that the function Range from the class Random with integer min and max arguments provides a random number between min and max-1. A version of this function with float arguments is available.
Add a call to this function in the function Start, after the initialization of historyRef. Test the application a couple of times to see if you get a different result.
The next function will handle the history. It receives as input the letter entered by the user and checks if it's already stored in the history. If it is, then the letter will be ignored and the function returns false. Non-alphabetic input must also be also ignored. Otherwise the letter is added to the history variable and displayed in historyTxt, and the function returns true:
// Check if the letter has been used before and if not,
// add it to the history. Returns true if the character
// is a letter and brand new.
bool CheckAddHistory(char letter) {
    if (history.Contains ("" + letter))
        return false;
    else if (!char.IsLetter (letter))
        return false;
    else {
        history += letter;
        historyRef.GetComponent<TextMesh> ().text = history;
        return true;
    }
}
In the function OnGUI, comment out the debug statement and add a call to this function instead with e.character as argument. Test this function to make sure it works. When you type letters, they should appear in the history text field, but if you repeat a letter, it should be ignored.
Now you should be ready to write some code on your own. First, we'll need a bool array to keep track of which characters in the word have been guessed so that we can display those on the stage instead of the underscore. We'll also need an attribute that keeps track of how many characters are left to guess. Add a private int attribute called leftToGuess and the following array:
private bool[] guessVisible;
Then in the function ChooseWord, add the following before the for loop:
guessVisible = new bool[word.Length];
and then initialize the attribute leftToGuess with the length of the array word.
Inside the for loop in this function, initialize all the values of guessVisible as false.
Next, write a bool function called CheckAddGuess taking as parameter a letter (char). This function should go through the string word and check if the character at position i (which is word[i]) is equal to the letter. If it is, then change the value of guessVisible[i] to true and decrease the value of leftToGuess. Use a bool local variable in this function initialized as false to store the fact that we found a match or not. Update the value of this variable in the right place inside the loop, and return it after the loop. Note that in case of a match you should not simply return true right away because you need to mark all the places that have been matched. Test this function.
We can now piece it together. We'll need another integer attribute, called missed, declared at the top of the class and initialized as 0 in ChooseWord. This will let us know how many characters the player has missed so that we know which body parts to make visible. Write another function that takes a char letter as argument, let's call it void PlayLetter. This function should first check if the number of misses is greater than 6 or if the number of leftToGuess is equal to 0 (the or operator is the same as in C++), and if that's the case, simply return because the game is over. Otherwise, it should call the function CheckAddHistory first. If this function returns false, then the function PlayLetter should also return.
Otherwise it should call the function CheckAddGuess with the letter. If the answer of this call is true, it means that this is a good guess. In this case you should check if the number left to guess is now equal to 0, which means that the player has won the game. If that's true, then you have to let them know somehow, for example, by changing the history text box to "You won". Either way, you need to update the content of the attribute guess in a way similar to what we have done in the function ChooseWord. You need to initialize before the for loop with an empty string. Then in the loop, this time you need to check guessVisible[i] and if it is true, then you need to add word[i] plus a space to the string guess, otherwise simply an underscore and a space like before. After the loop you need to update the text attribute of the text mesh component like before.
If the answer of CheckAddGuess is false, then this is a bad guess and you have to increment the number of misses. In this case, check if the number of misses is larger than 6, and if true, then change the history text to reflect the fact that the game is lost. Then replace the call to CheckAddHistory in the function OnGUI with a call to the function PlayLetter. This allows us to test the functionality we have so far. Compile the code and play the game to make sure both options work.
Next, based on the number of misses, you need to make visible one more body part by making it active. For this, at the beginning of the class, declare a public GameObject array called parts. Do not initialize it. Save the script, compile it, and go back to Unity. Under the script component of the guessTxt object in the Inspector, you should see a new attribute called Parts with a size of 0. Increase the size to 6. The array should now show 6 elements, all of them with the value None. Drag and drop each body part onto an element of the array, in the order in which you want them to be activated.
Going back to the function PlayLetter in the script,
modify the test for missed being greater 6 by replacing the
constant with the length of the array parts in both
places. Then at the end of the function, if the number of misses
is not larger than the number of parts (the else of
the last test), make the next part active by doing
parts [missed-1].SetActive (true);
Finally, when the game is lost, also set the text of the text mesh component to the value of the word (so that the player knows what it was).
Your game should be ready to go. Test it to make sure it works in both cases. Comment out any debug statements.
As a last step, after you make sure everything works, from the File menu choose Build and Run. This will create a stand-alone executable for the platform of your choice. First, you need to add the scene to the executable. You can simply do that by clicking the button Add Open Scenes. Create a folder called Build inside the project folder (not inside the Assets folder). Create an executable for your architecture (so you can test it) and one for WebGL or Windows (so that I can test it). Note that you will need to upload both the executable itself and the folder with a name ending in "_Data" containing the resources needed to run it.
Create a zip file and copy inside it the WebGL or Windows executable, the ..._Data folder, and the source file RunGame.cs. Upload it to Canvas to Homework 1, as this is your homework. There is no separate submission for the lab.